Around 1.5 months ago, I have started learning iOS development using SwiftUI. I am building a small app to keep track of my finances. As part of my learning, I decided to set up a workflow to run Xcode tests using GitHub Actions. And today, I want to share my experience of doing it.
Let’s start easy - running tests locally
One small step at a time they say. Let’s start with running our tests on a local machine. I assume you have already created an Xcode project. In addition, this article is not about writing unit or UI tests. If you want some references, please, check this article. But, by default, your project has some empty tests, so you are good to go.
We will use xcodebuild tool to run tests.
Go to your Xcode project directory and run in terminal the following command:
$ xcodebuild test -project MyProjectName.xcodeproj \
   -scheme MyProjectName \
   -sdk iphonesimulator \
   -destination 'platform=iOS Simulator,name=iPhone 12,OS=15.0'
My Xcode version is 13.0 so it supports iOS 15.0.
If the above command failed, please, check the error message.
There is a chance you have a different Xcode version installed.
The error message will indicate available iOS versions on your machine.
You will need to modify the OS parameter in the destination field accordingly.
The command will launch both UI and unit tests. If things went well, you should get a similar output.

Good job! Let’s move to the next step.
Putting GitHub Actions into action - first workflow
We know how to run tests locally, it is time to move to GitHub. I don’t want to repeat GitHub documentation, so if you never used Actions, please, check Quickstart and Understanding GitHub Actions articles from the official page. Those are pretty good.
Continuing our journey, here is a simple example of a workflow.
name: tests

on: [push]

jobs:
  run_tests:
    runs-on: macos-11
    steps:
    - uses: actions/checkout@v1
    - name: Select Xcode
      run: sudo xcode-select -switch /Applications/Xcode_13.0.app && /usr/bin/xcodebuild -version
    - name: Run tests
      run: xcodebuild test -scheme MyProjectName -project MyProjectName.xcodeproj -destination 'platform=iOS Simulator,name=iPhone 12,OS=15.0' | xcpretty && exit ${PIPESTATUS[0]}
We are using macos-11 runner which provides us with various Xcode versions. Then, we select Xcode version (in our case 13.0) that allows us to test the app with a desired iOS version (in our case 15.0).
A list of supported Xcode and iOS versions for macos-11 runner is available here. You can find similar lists for other macos runners here.
In the end, we run the same command to run tests as in the previous step but with one addition. We are using xcpretty to format xcodebuild results for better readability.
Running job with different iOS versions
You can use Action’s matrix feature
to run a job with multiple parameters.
The workflow below will run two jobs: one with iOS version 15.2 and second with version 15.0.
As before, we also need to specify appropriate Xcode version.
name: tests

on: [push]

jobs:
  run_tests:
    runs-on: macos-11
    strategy:
      matrix:
        include:
          - xcode: "13.2"
            ios: "15.2"
          - xcode: "13.1"
            ios: "15.0"
    name: test iOS (${{ matrix.ios }})
    steps:
    - uses: actions/checkout@v1
    - name: Select Xcode
      run: sudo xcode-select -switch /Applications/Xcode_$.app && /usr/bin/xcodebuild -version
    - name: Run unit tests
      run: xcodebuild test -scheme BudgetOnTheGo -project BudgetOnTheGo.xcodeproj -destination 'platform=iOS Simulator,name=iPhone 12,OS=$' | xcpretty && exit ${PIPESTATUS[0]}
I added a parameter called name to the job to make it appear better. Results:
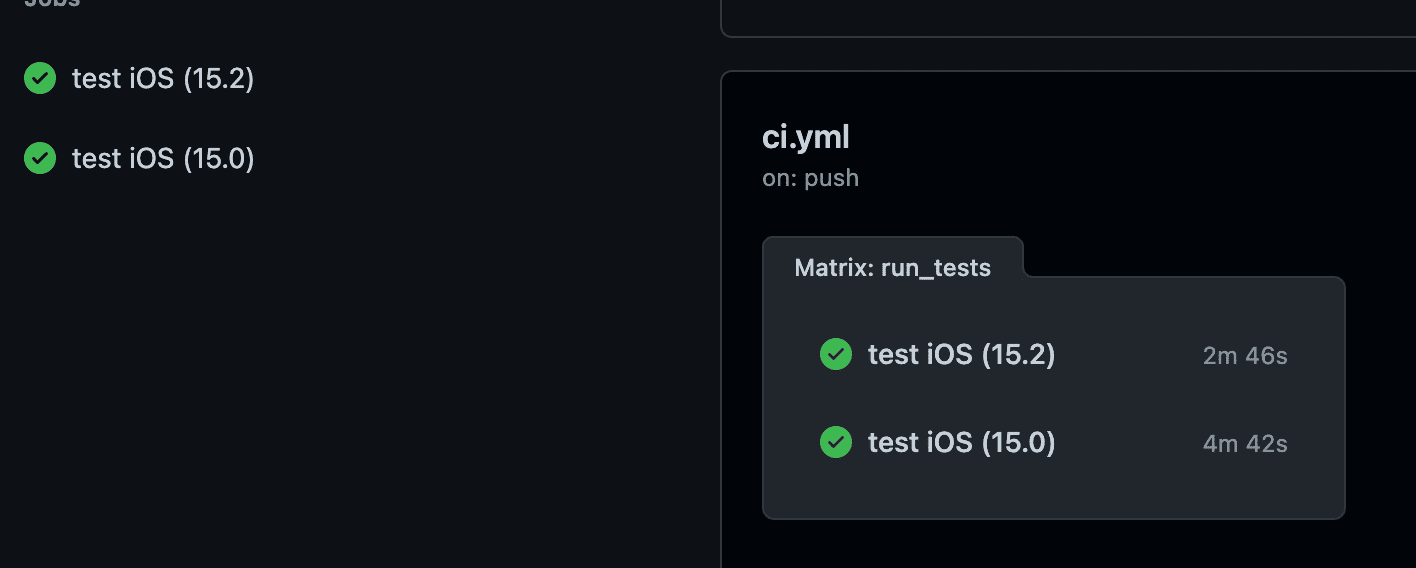
You can also use matrix feature to test different device configurations, etc.
Disabling UI tests
When developing my app, I didn’t want to have UI tests
at the beginning. I expect the interface to change a lot.
Even without having to write new UI tests,
there are still some empty tests that take time to initialize.
This is important because
GitHub Free plan allows only for 2000 minutes per month.
And 1 minute of macOS runner is 10 minutes of a regular runner
(details).
I would like to save some free minutes I have ![]()
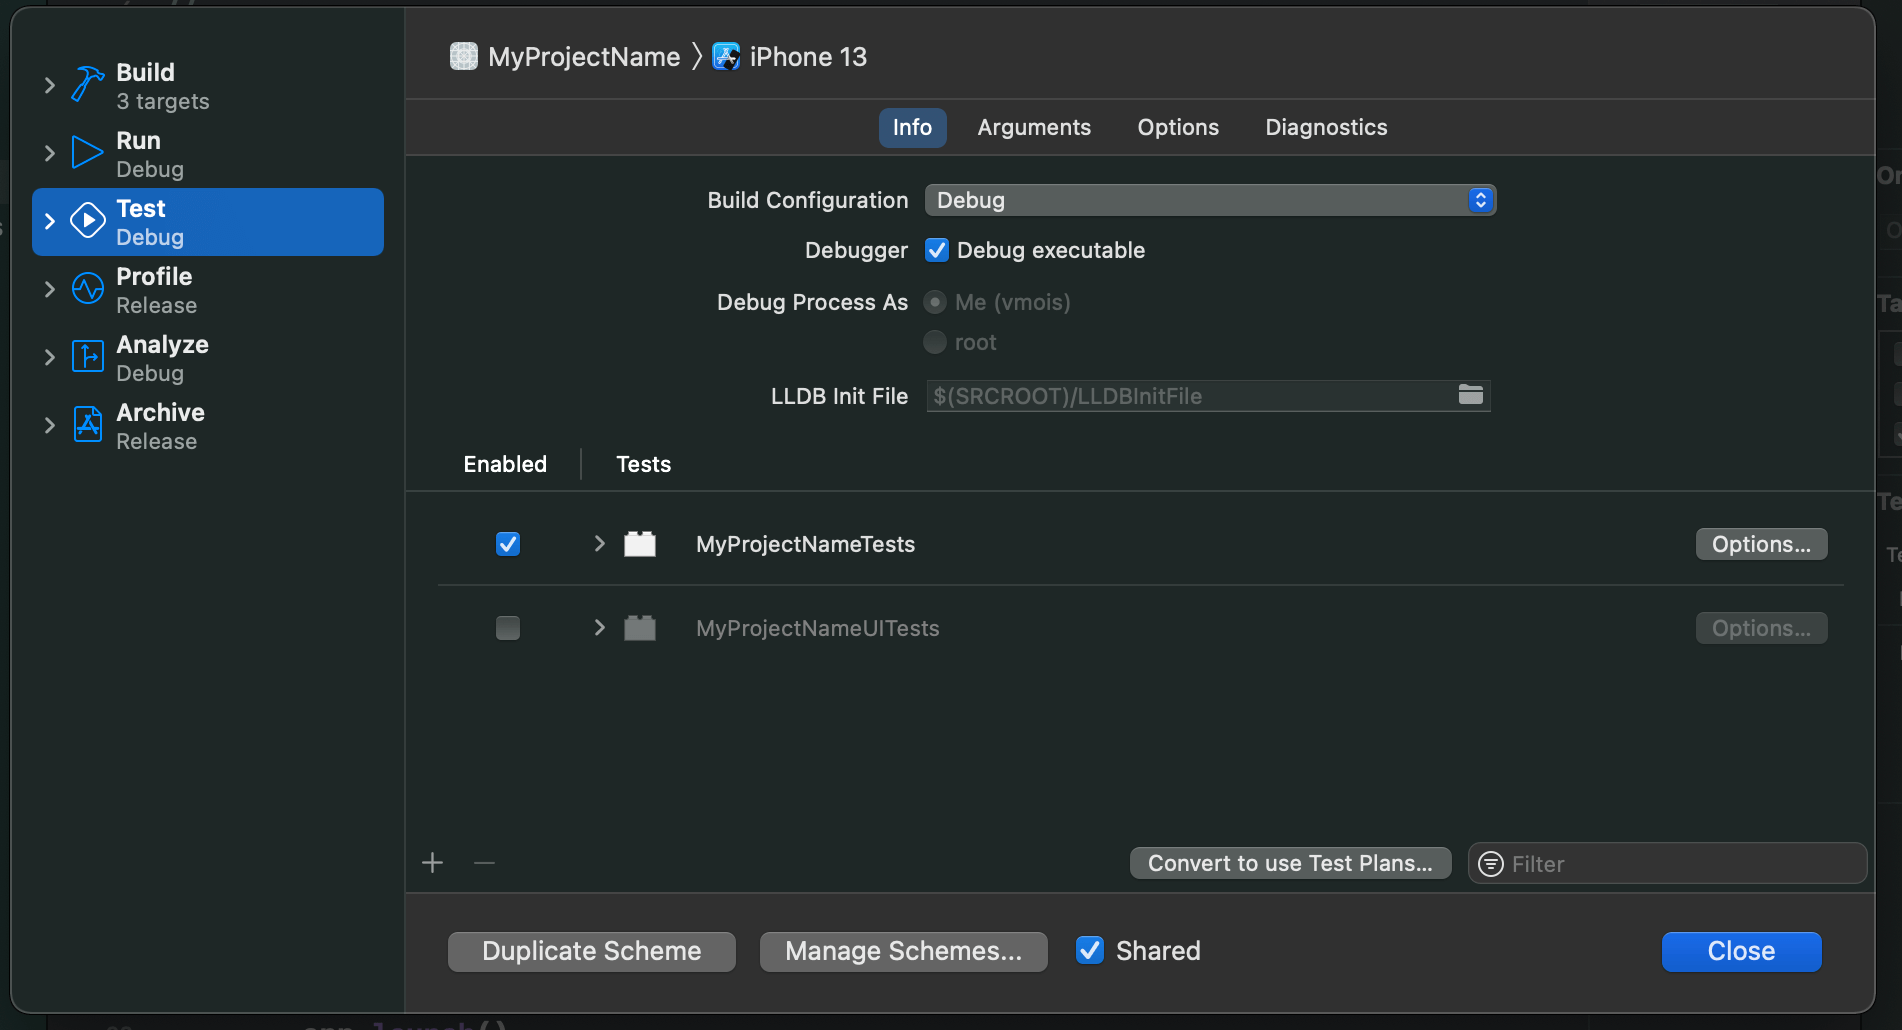
Considering all the above, I decided to disable UI tests. How to do it?
You will need to disable them in your project’s schema. Go to Xcode, then Product > Scheme > Edit Scheme, uncheck “Enabled” field near the “MyProjectNameUITests”.
Conclusion
Congratulations! I hope you have your GitHub Action workflow up and running. This is a sufficient setup for the beginning, but you might want to go further with your CI. For example, adding a linter check for Swift, or writing some UI tests. Thank you for reading this article! See you.