GitHub Projects is a recently released free GitHub project management tool that provides a flexible way to organize work. Despite that it is still in beta, I think this is a big step forward. But, with great flexibility comes great uncertainty. That is why, in this article, I want to share some tips on how to use GitHub Projects effectively.
In addition, for some tips, you will find examples of public GitHub Projects that follow the tip. This can be an inspiration for how to organize your own project.
1. Use draft issues
Draft issues belong to your GitHub Project instead of a repository like regular issues. You can add title and description in a similar way as with regular issues.

In addition, you can assign fields values to created draft issues (except “Labels” and “Milestones” fields as they require a regular issue).

Draft issues can be useful for your project management activities. For example, during the planning. Instead of writing future tasks in an external place like Google Docs. You can keep them close to the ongoing work as draft issues in your GitHub Project. And with custom fields that represent, for example, priority and size, you can sort and filter tasks to understand what matters the most. The draft issue can be converted to a regular issue with a click of a button later.
Docs:
Examples. Projects that are using draft issues:
2. Use “Iteration” type field
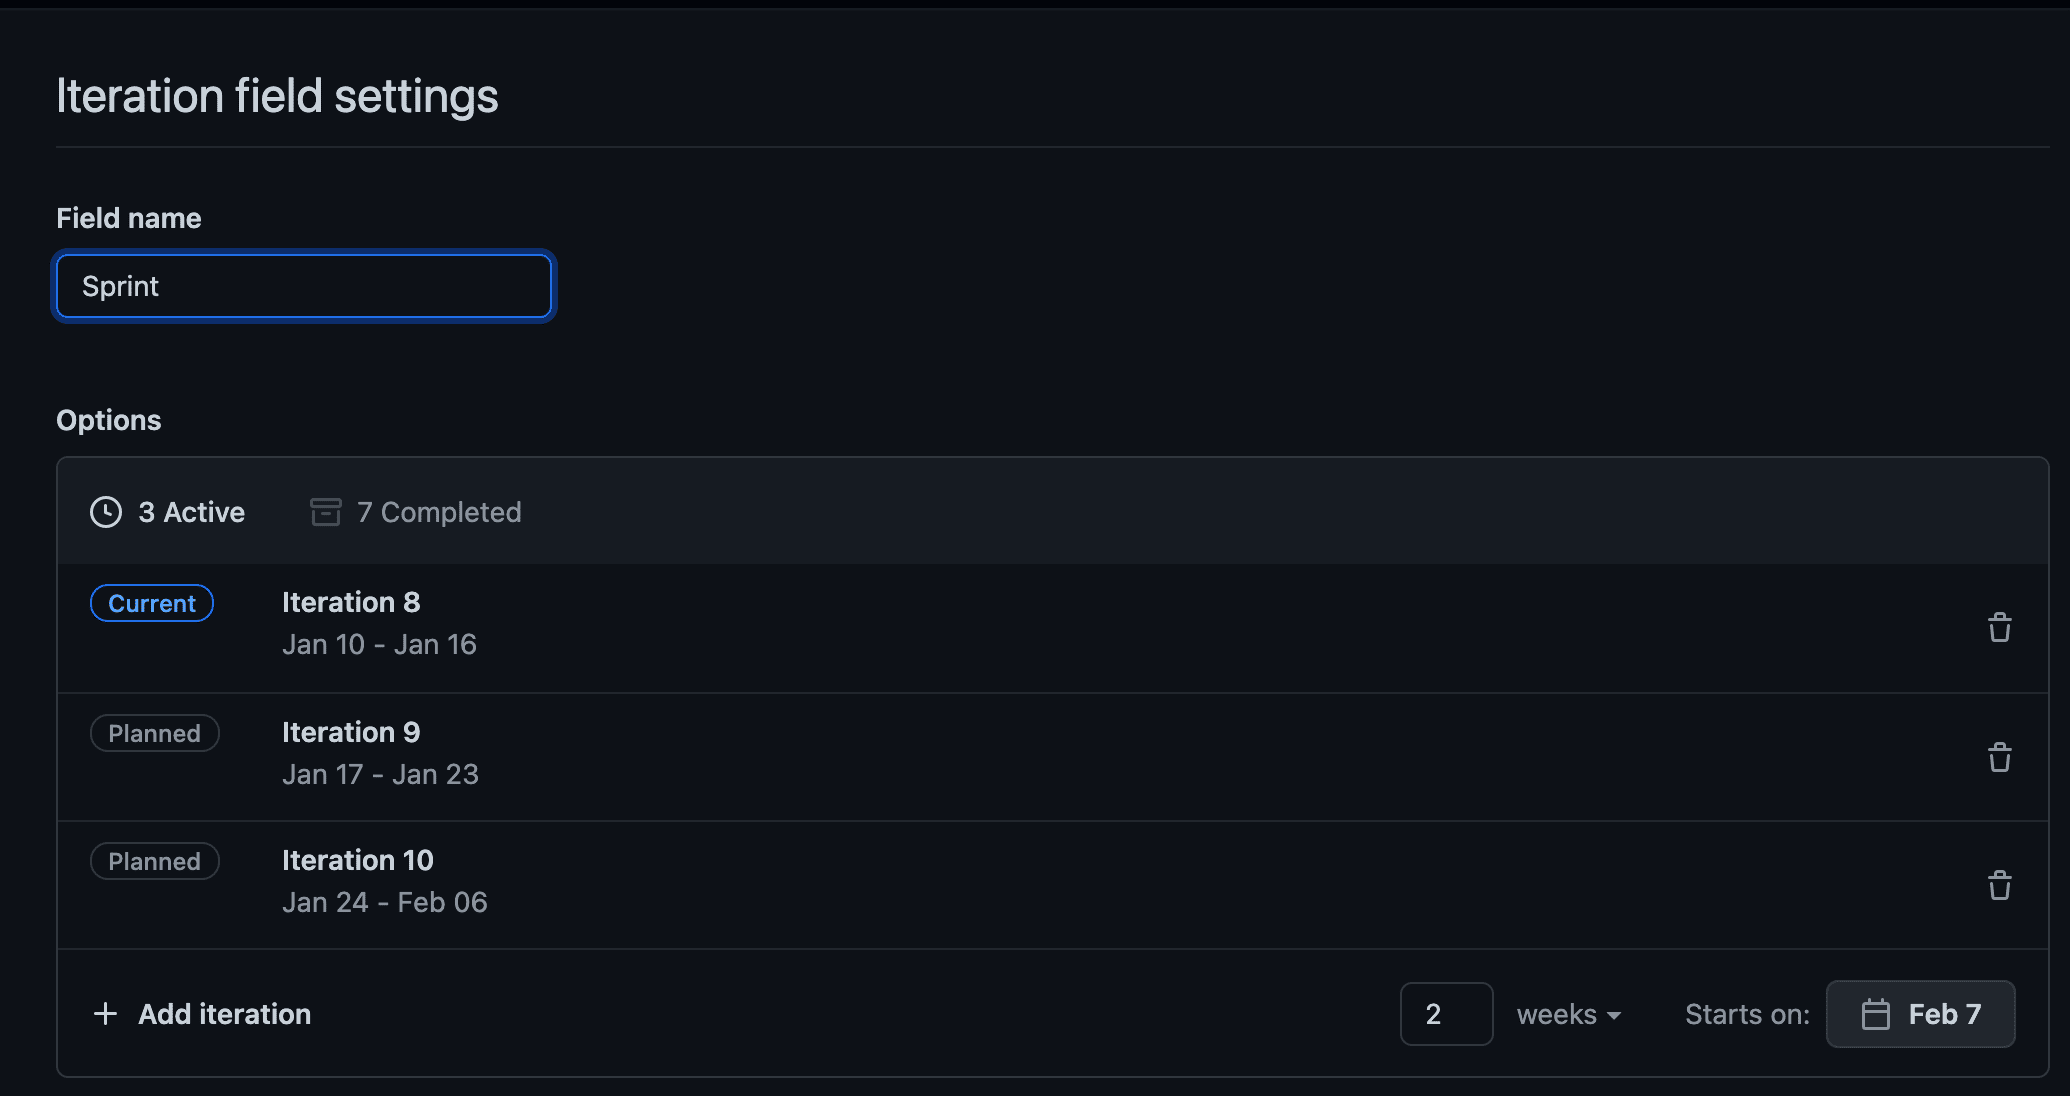
The “Iteration” field type allows you to create flexible time ranges within a project and assign them to your issues.
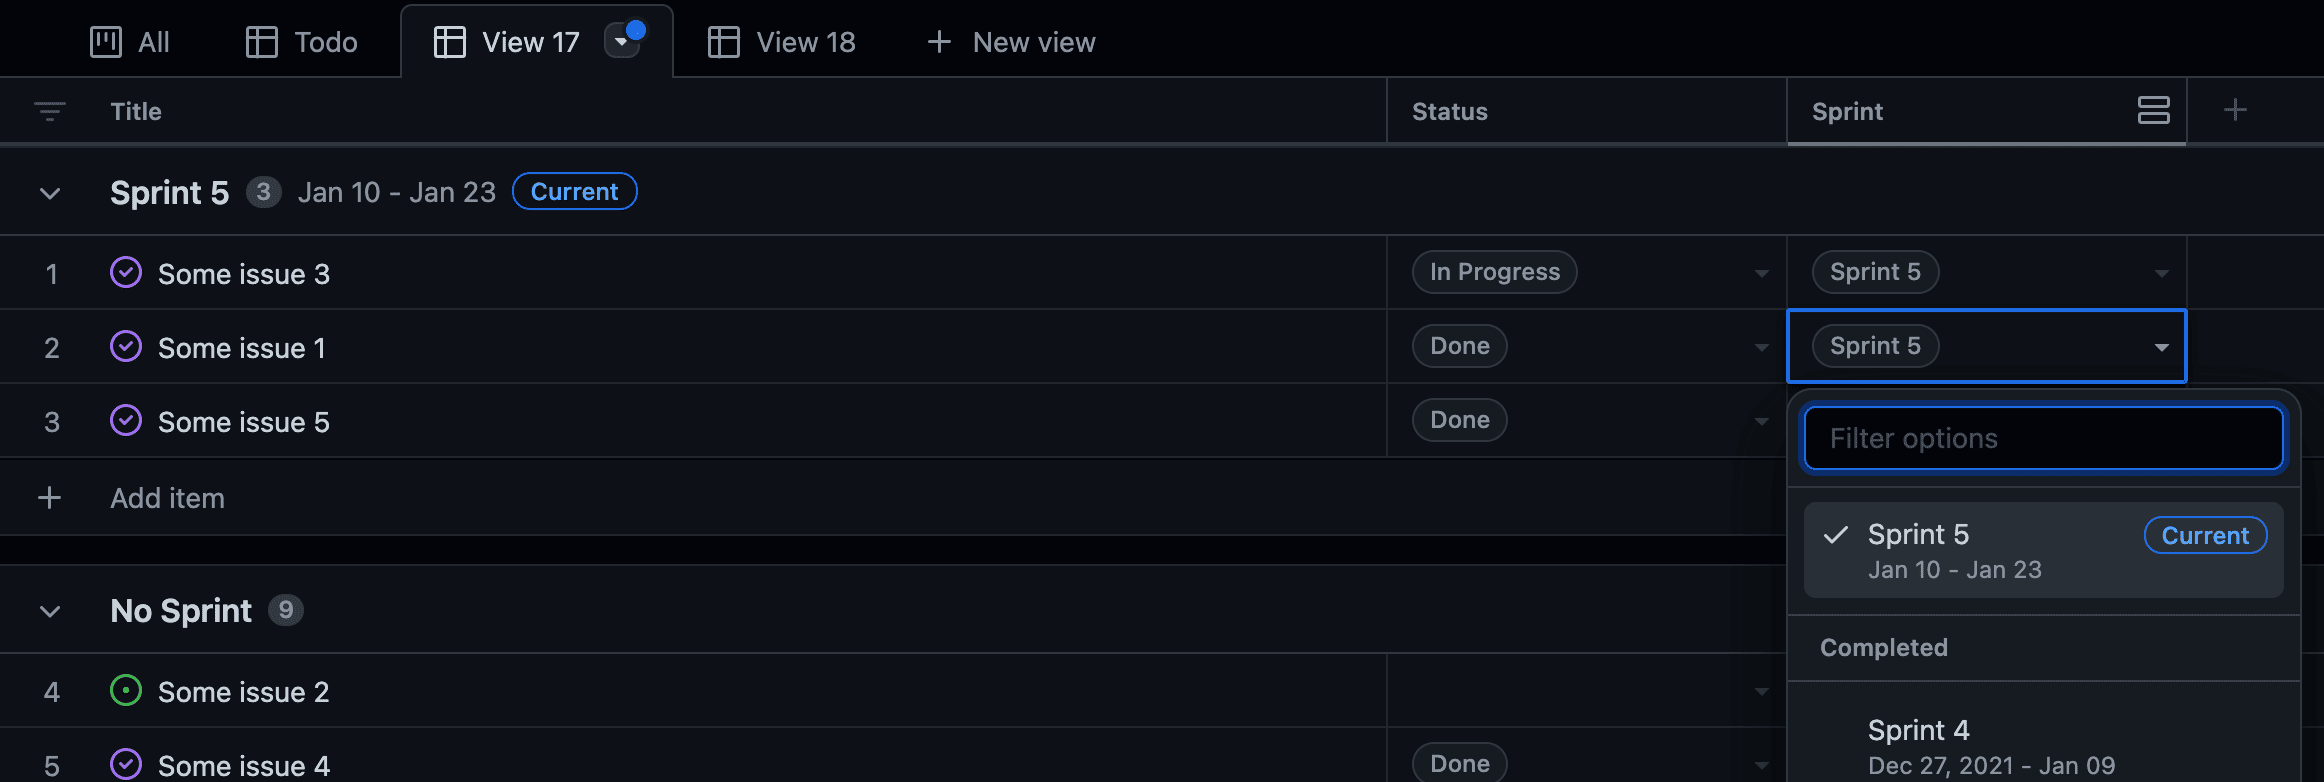
You can see a field named “Sprint” that has the “Iteration” type below. Time ranges can be different, customized separately.

Now, in the project, you can assign created time ranges to a specific issue.

This field type is useful if you are following agile practices. You are able to track issues over time and plan work ahead.
In addition, in the same way as with other fields, you are able to group and filter time ranges.
Examples. Projects that are using “Iteration” type field:
3. Use “Linked Pull Requests” field
This field contains a list of pull requests linked to the issues in your project. No need to leave the board to see what PRs are linked. The field is created automatically for each project. You only need to include it in your view.

Docs:
4. Use icons for your field values
Use icons to make field values more recognizable and better looking. The best way to illustrate the tip is by visual comparison. Check two screenshots below. What do you think?
Without icons
![]()
With icons
![]()
Aren’t values with icons look better? But, how to add them to your field values? Follow the steps:
- Go to “Settings” page;
- Under the “Fields” tab, click on the field you want to change;
- For each field value, add emoji of your choice in a form of
:emoji_name:, e.gLow :star:.
Below you can find animated step-by-step guide on how to add icons to field values.
![]()
Not sure what emojis exist? Check the list of emojis supported by GitHub.
Examples. Projects that are using icons for their field values:
5. Follow the development
If you are excited about new features or waiting for missing ones, you can do a couple of things:
-
check regularly GitHub Issues Changelog to get the latest updates on new features and improvements;
-
check once in a while GitHub Public Roadmap (go to “GitHub Issues” view) to see what features to expect in the future;
-
provide feedback; this helps the GitHub Projects product team to understand what work to prioritize.
For example, I am following parity with the classic Projects issue. This issue will make a transition from classic Projects to a new one smooth.
Conclusion
I think the Projects tool is a big step forward in the project management area for GitHub. The tool is still in beta, and under active development, so a lot of exciting features are ahead of us. As time goes, I will update the article with new information. Thank you for reading!
Note: You can find a code, and list of GitHub Projects collected for this article in this repository.